I found myself in a situation where I have temporary emergencies that I would like my trusted friends to be have audited access to a subset of my accounts with a prescribed short wait period so I could still stay on top of my affairs.
Objectives
I want to build a system that has the following properties:
- Stores my account credentials securely with API for syncing with Keepass2.
- Identity or Policy based access control.
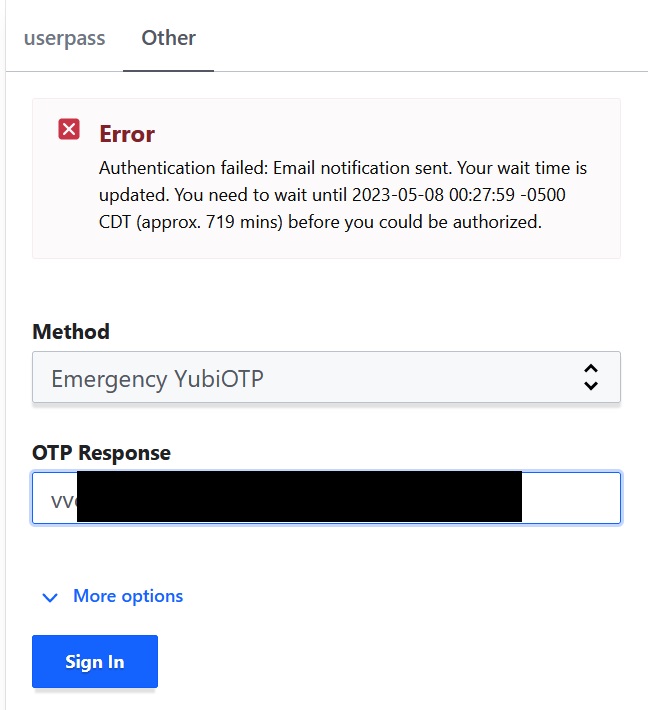
- A login system that imposes a wait period on these emergency accesses where I could be notified and take action if necessary.
- A WebUI for accessing credentials.
System design
I saw that the system is complex enough I need a baseline to start with. I chose Hashicorp Vault which is an overkill for the purpose of storing personal account credentials but its built-in WebUI, identity-based access control and plugin capability made this a good match.
We will configure vault with:
- 10 Unseal keys with a key threshold of 3. This will allow my friends to share their key portions generate a root token for me in a permanent situation. Docs
- Audit log to a file turned on. Docs
- Set up a custom authentication plugin that sends email notifications and only allow login after a wait period. Docs
System setup
Code Development
Password sync
We need to write a little program to sync entries from Keepass2 to Vault.
I tried this “keepass-vault-sync-plugin”, it didn’t work. I think writing a new Keepass plugin is too much effort for the simplicity of this task so I wrote a standalone application.
The logic is pretty simple, you open the database and translate each entry into a Vault secret.
The source code for this is available here.
Update 5/10/2023:
I ended up feeling writing my own Keepass Plugin is much easier from a secret management perspective that I do not need to find a way to route my Vault AND Keepass secrets to one more place.
I am not very fluent in C# and its build system, only point and click on the GUI of Rider and I could not get the PLGX plugin system to work. (Also it does not support .NET 5.0 upwards so I did not want to deal with it).
In the end I designed a system with inspirations from the above mentioned keepass-vault-sync-plugin but
fully rewritten with more focus on the features I want,
like being able to do multiple syncs with custom filters based on tag or path.
Here is a screenshot of the plugin in action, it will figure out the vault credentials and corresponding filters from special Keepass entries, sync all entries to vault and optionally delete orphaned entries in vault.
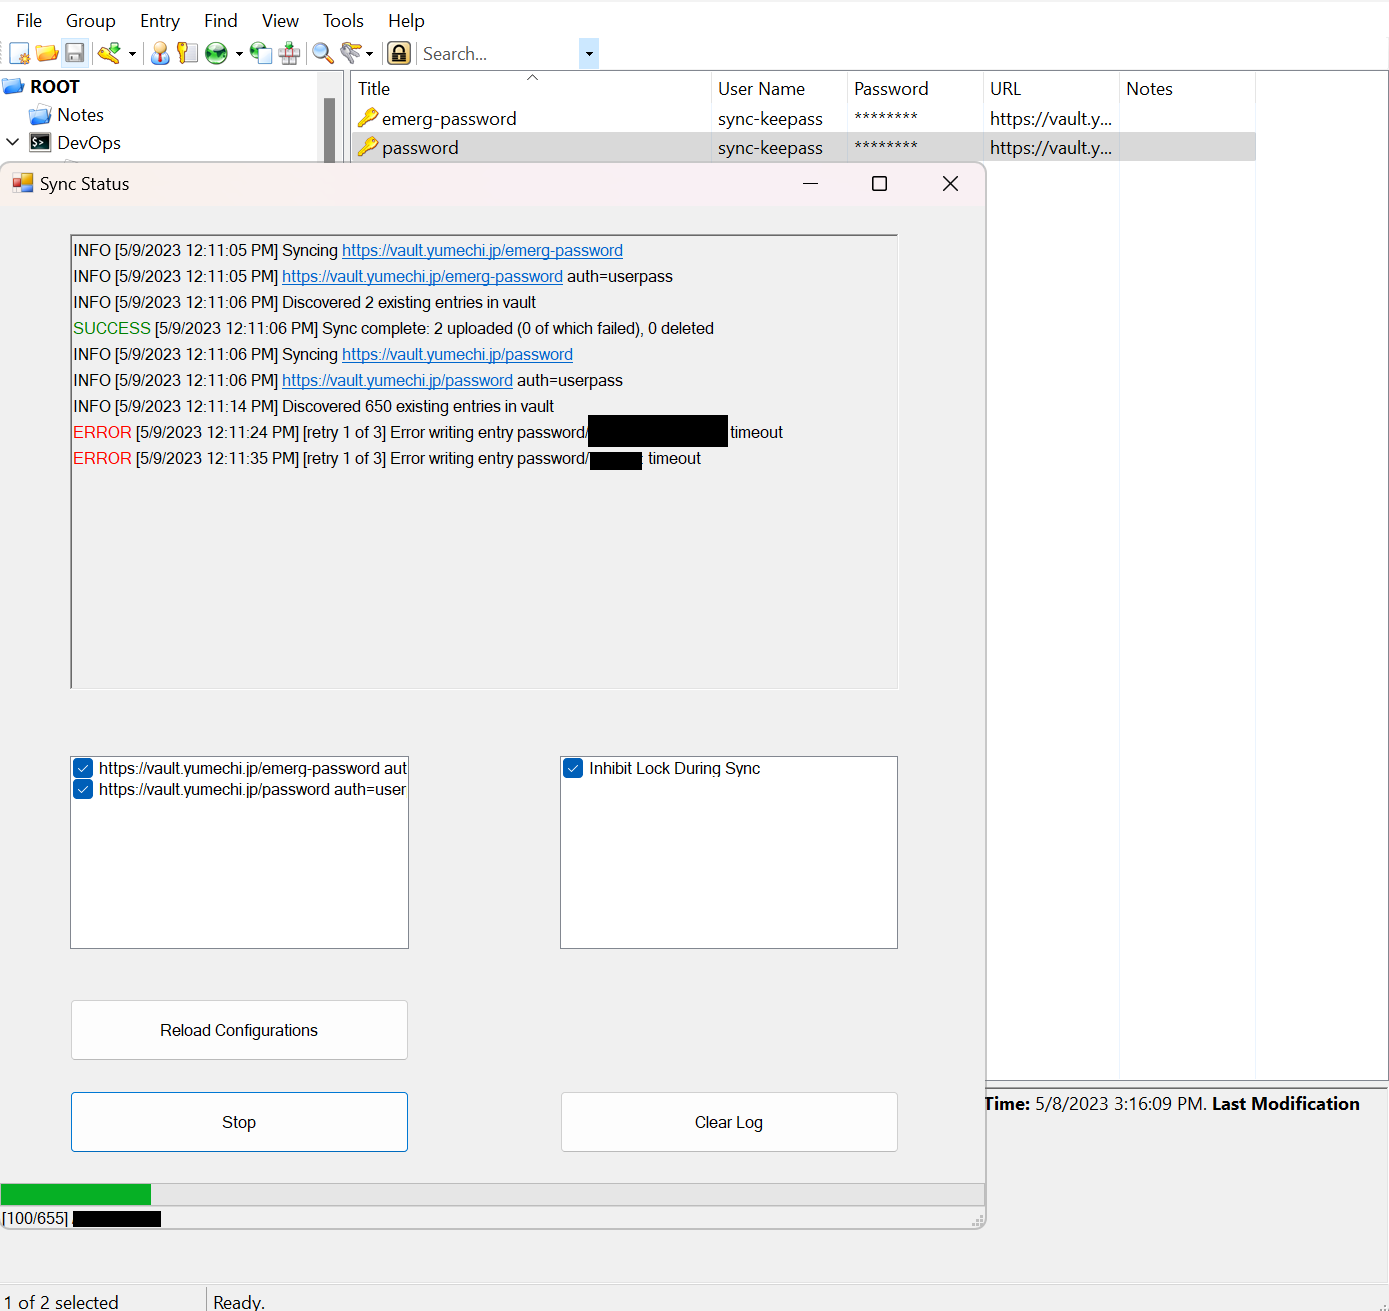
Not sure if it is my connection or the Azure storage backend sometimes I get timeouts on requests so I had to add a retry. So far I have not had a permanent failure after 3 retries.
Writing the Authentication Plugin
I got a bunch of pretty cheap YubiKeys in the Cloudflare promotion so I was thinking of using YubiKey password login as the authentication method. An additional benefit of this is I can use the key as 2FA method as well.
Vault plugins are just regular binaries the implement a specific IPC interface. It is just much easier to start with an existing plugin instead of trying to write the plugin from scratch. I referenced this in writing this plugin.
In general we need to implement the following paths:
auth/emerg-yubiotp/key/(?P<name>.+)CRUD for the key definitions.auth/emerg-yubiotp/keylist all keys.auth/emerg-yubiotp/loginlogin with a key.auth/emerg-yubiotp/configconfiguration for the plugin. Such as SMTP server, YubiCloud API key, etc.
The login part of the code is pretty straightforward. See here for the source.
We also need to do some checking on token renew to make sure the key is still eligible for access:
| |
My plugin code is accessible here.
UI Patching
The built-in vault UI unfortunately does not autodetect additional auth methods and generate forms for them. So I had to patch the UI code to add this authentication method in. The UI does not use TypeScript but ember.js which I am unfamiliar with, but thankfully my use case is simple I can just reference existing code.
After applying the patch use make static-dist to build the UI and make bin to build the vault binary.
Vault Initialization
Instance Creation
After the plugin and UI patch has been taken care of we will spin up the vault instance.
We will prepare a docker compose file for running vault. We will use the official vault image but we will bring our own vault binary so that the served UI will have the additional authentication method.
| |
| |
Firstly we need to initialize the vault and retrieve the unseal keys and root token.
| |
Then we could log in on the Web UI and finish setting up my user account there. This is pretty straightforward just enable the userpass auth method and create a user. After that I assign a full access policy to my user entity. Then we revoke the root token using the Web UI and log back in using my user account.
Secret Separation
I created two V1 (non-versioned) KV secret backend at password/ and emerg-password/. The first one will sync fully with my Keepass database and the second one will only sync entries with a tag set.
We will use the gadget I wrote earlier to sync the secrets.
| |
Plugin Installation
Copy the built plugin binary to the plugin directory. Then we need to add the binary sha256 into the plugin catalog so the vault server knows the binary is legit.
| |
Then we enable the auth method and write in our first emergency key.
| |
Go to the Vault UI and it works!
After verifying that we have received the confirmation email we can speed this up for testing purposes:
| |
Setup Permissions for Emergency YubiOTP
By default only the “default” policy will be assigned to the login which does not permit the key to access any secrets.
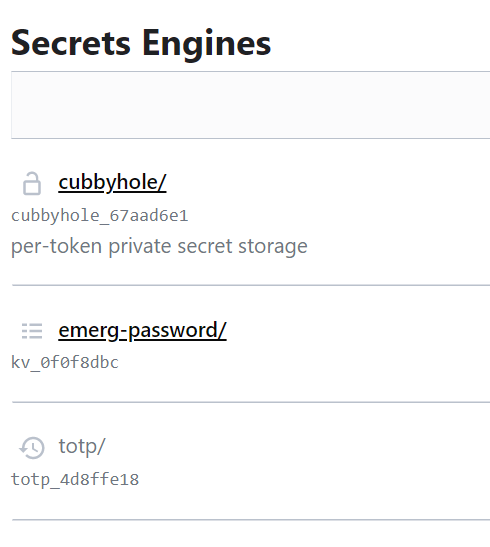
I added a policy using the WebUI called emerg-yubiotp which will grant the limited secret scope.
| |
Now when I try to login using the emergency key I can see the scoped secret engines.
Using the System
Emergency Sheet
I prepared a document for friends that contains:
The objectives of using this system.
A short introduction on how to use a Yubikey.
1-2 unseal keys.
Step-by-step instructions on how to log in to the Vault UI using the emergency key, including:
- Instructions on when the Vault is sealed (ask another friend to put their unseal key in as well).
- How to access credentials.
- How to access TOTP codes. Unfortunately the Vault UI does not support TOTP yet so we will need to use the Web CLI.
Press the terminal icon on top right. Put “list totp/keys” to get a list of accounts. Choose the account you want and then put “read totp/code/something” to get a code for something.
Instructions for disaster, how to ask a technically inclined friend to help me in a dire situation:
- Rebuild my vault instance if my server is lost.
- Execute the root token procedure gain full access my vault.