Registering a Discord Bot
Creating the Application
Go to the Discord Developer Portal and create a new application. Give it a name (and maybe a pfp).
Creating the Bot and Getting the Token
Then, go to the bot tab and create a bot. Give it a name (and maybe a pfp). Then hit “Reset Token” to get a token for authenticating your bot, note this down to later use in your code. Then in “Privileged Gateway Intents”, enable the “Message Content Intent”.
Prepping the Project
Creating the Project
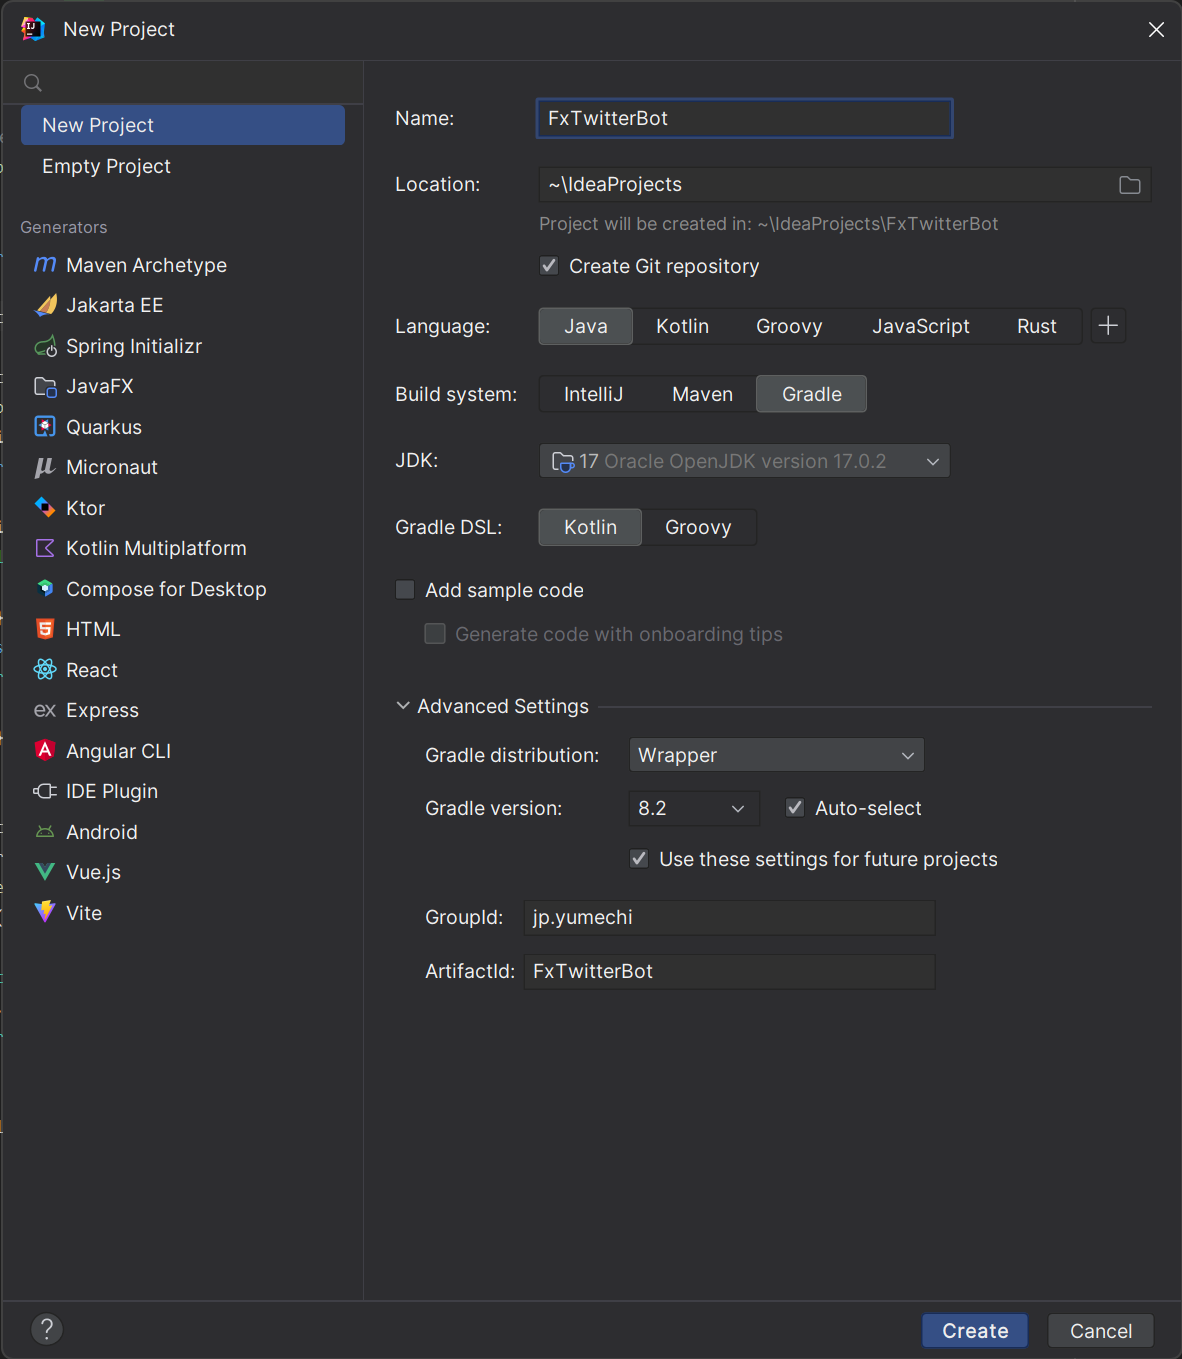
Go to IntelliJ IDEA and create a new project. Select “Gradle” for the build system. Choose Kotlin as Gradle DSL. Then under Advanced -> GroupId put in your domain in reverse order (like jp.yumechi), if you do not have one put io.github.<your github username>. Then put in a name for the project. Then hit create.
Installing the Dependencies
- Go to the
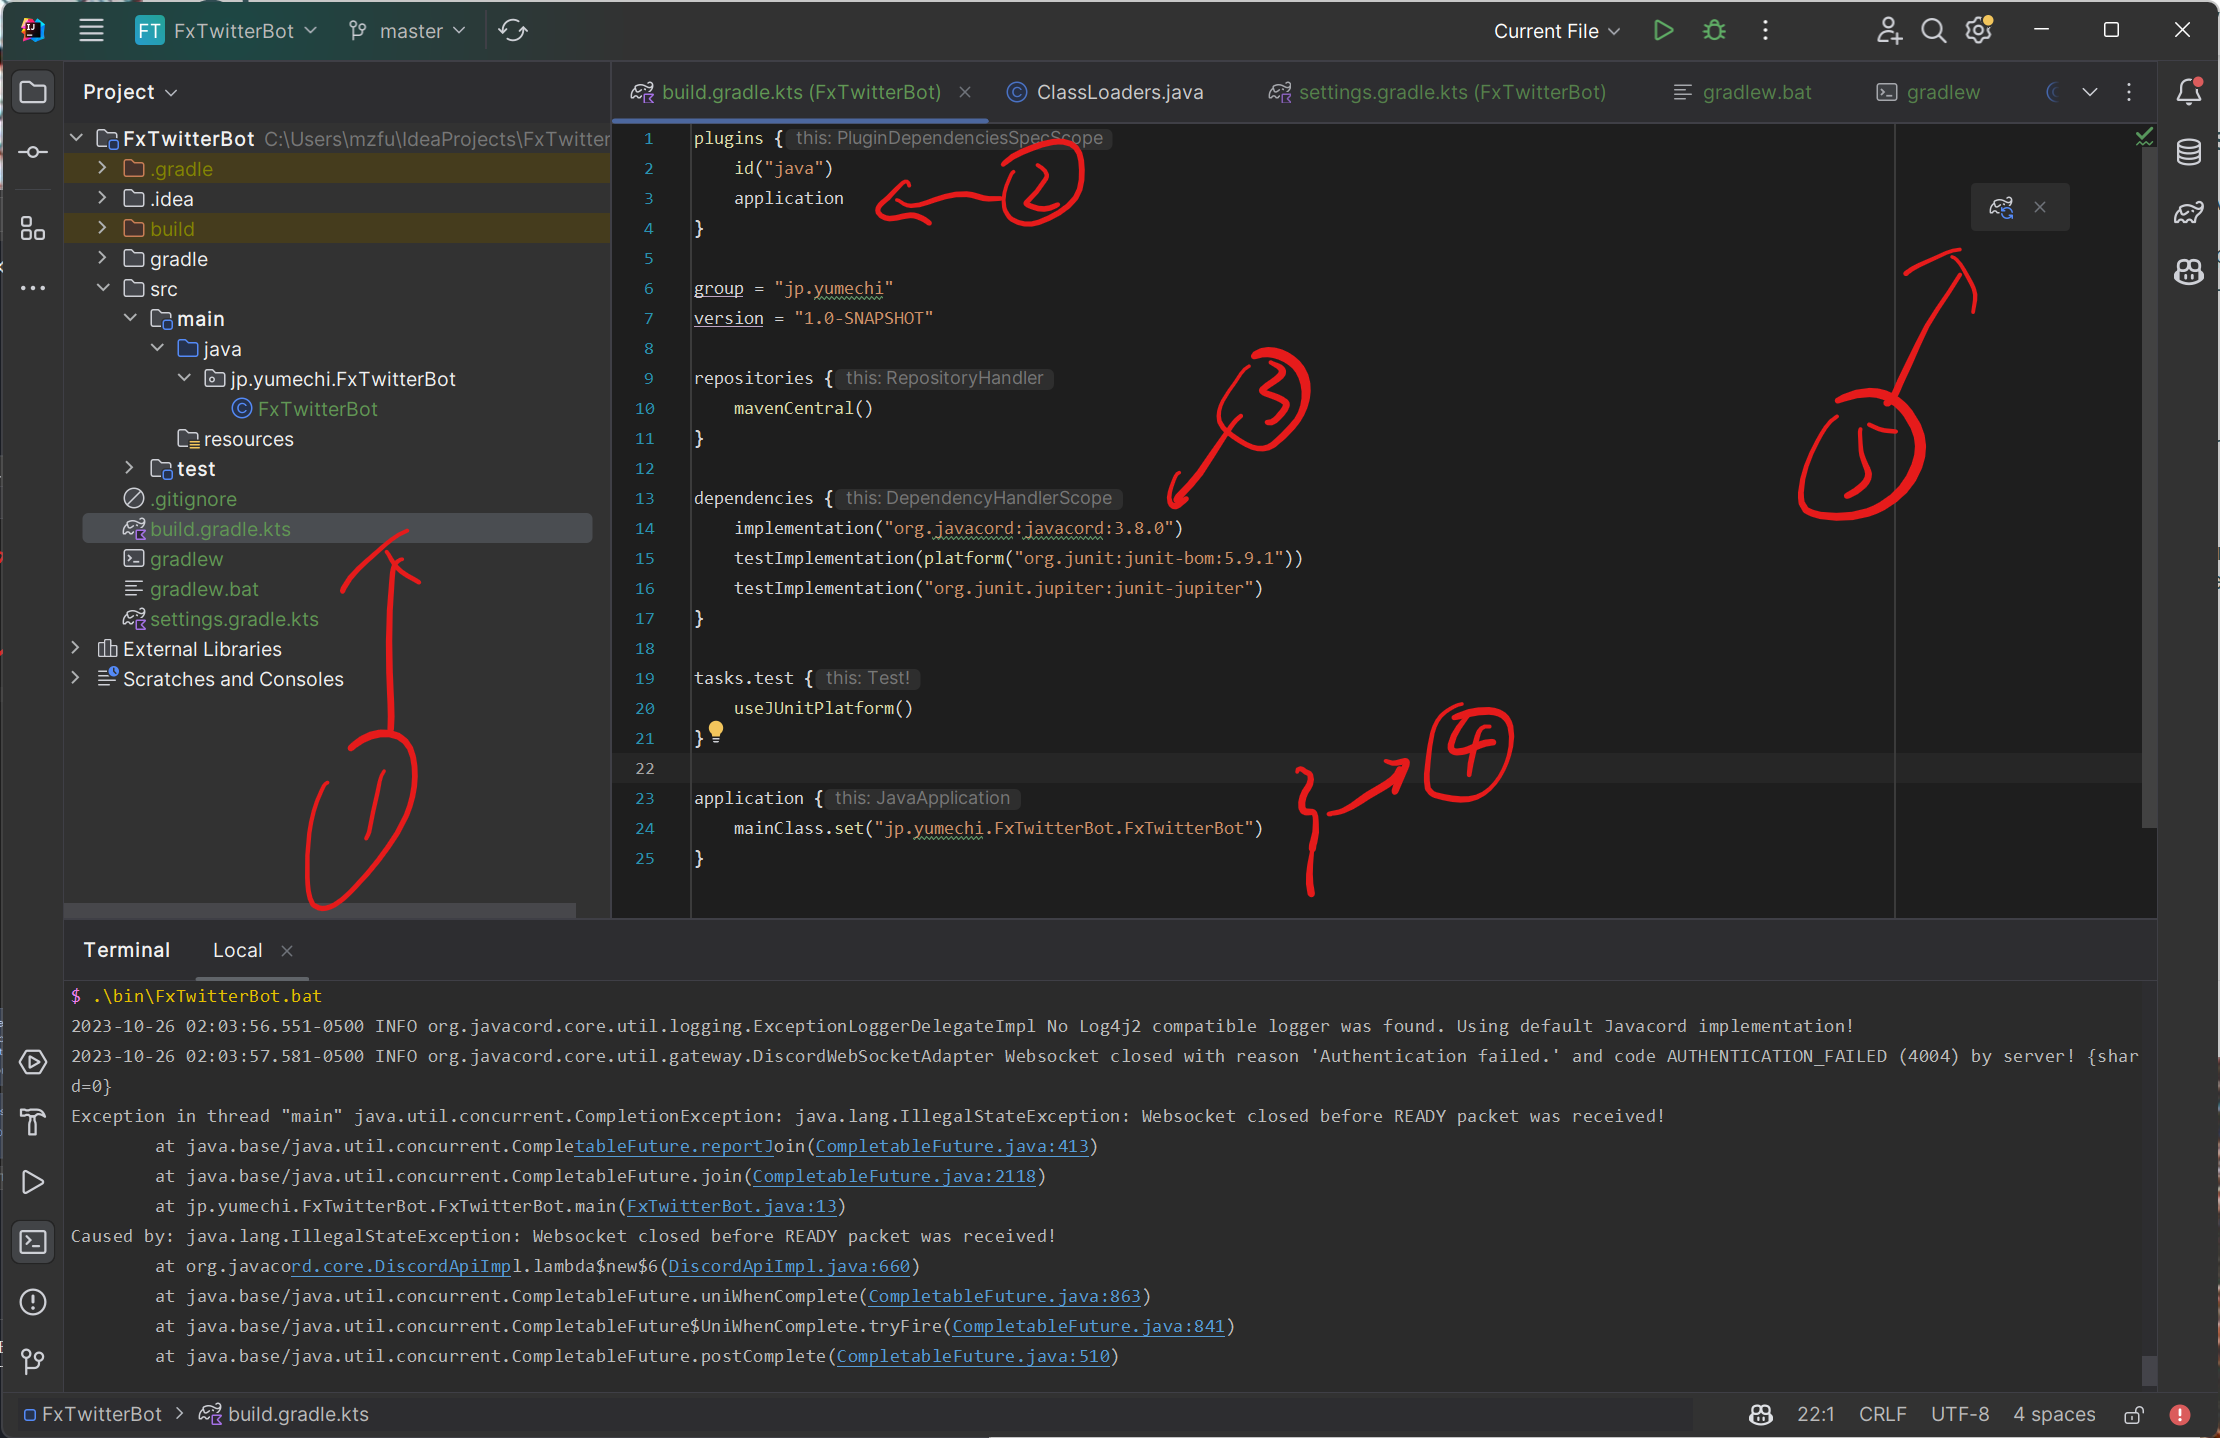
build.gradle.ktsfile then: - Add the “application” plugin to the
pluginsblock:
| |
- Then add the following lines to the
dependenciesblock:
| |
- Then register your main class at the bottom:
| |
- At last hit the “Sync” button in the top right corner.
Write the Code
Creating the Main Class
First create a package in src/main/java that corresponds to the main class you set in the last step. For example if you set jp.yumechi.FxTwitterBot.FxTwitterBot, you will create a package called jp.yumechi.FxTwitterBot and then create a class named FxTwitterBot in that package.
Then add the following code to the class:
| |
Running the Bot Locally
Then in terminal (Alt-F12) run ./gradlew.bat run (Windows) or ./gradlew run (Linux/Mac) to run the bot locally. The program should print out an invite link to add your bot to your server.
Deploying the Bot
TBD